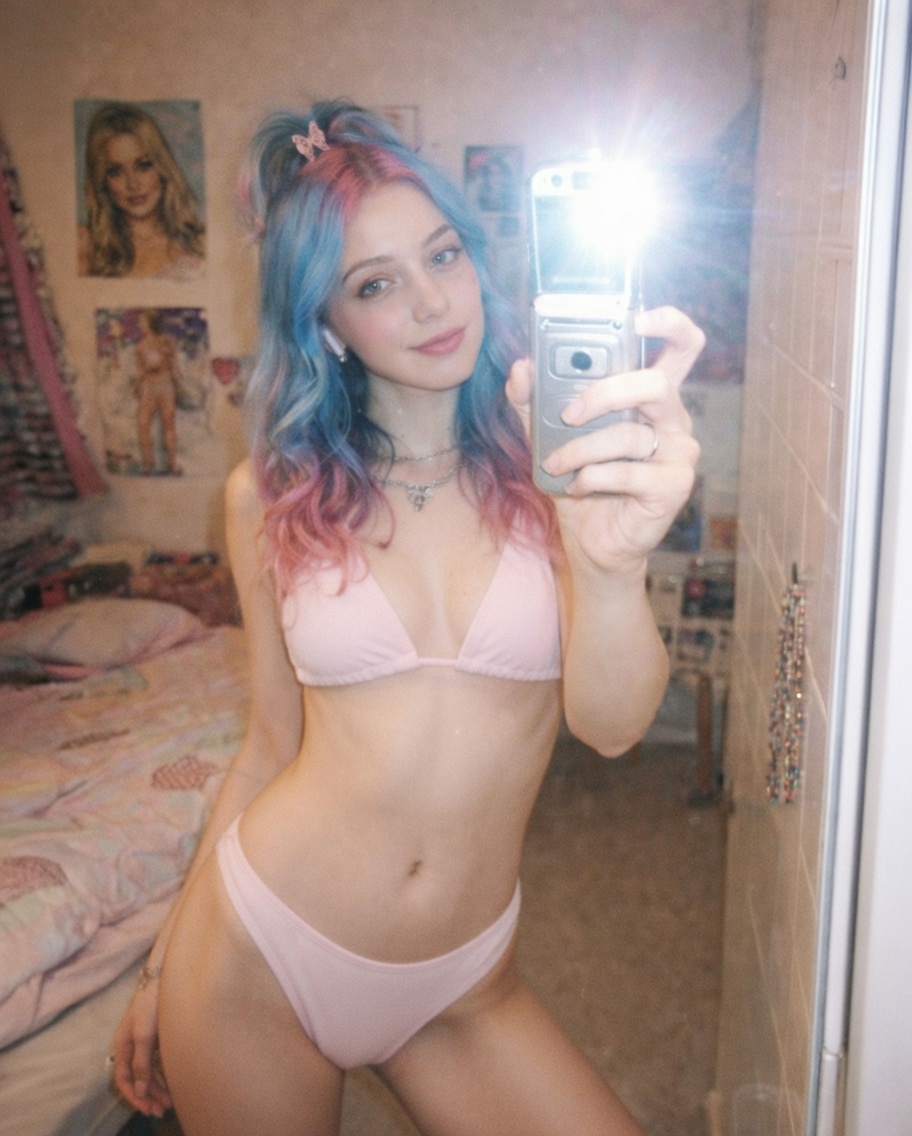
Why This AI Bikini Swap Looks Natural Instead of Fake
The difference between a convincing AI clothing swap and an obvious paste job comes down to three things: skin-to-fabric boundary, lighting consistency, and body-shape fidelity. This result nails all three. The bikini sits on the body with natural creases at the waist and soft shadow underneath the top edge — details that most quick swaps miss entirely. The fabric catches the same overhead light that illuminates the skin, which eliminates the "floating sticker" look that breaks realism in lesser edits.
Identity preservation is the other half of the equation. The subject's blue-to-pink gradient hair, facial expression, and even the phone-holding hand remain pixel-accurate. That level of consistency matters because any drift in hair color or jawline shape immediately signals to the viewer that the image has been manipulated. Here, the only visual change is the clothing itself — everything else stays locked.
The casual mirror-selfie composition also helps sell the effect. A studio-lit fashion pose would invite closer scrutiny, but a bedroom mirror shot reads as an everyday snapshot, which lowers the viewer's suspicion threshold.
Key Insight: AI clothing replacement looks most convincing when the original photo has natural, unposed lighting — the model can match fabric shading to existing light sources instead of guessing.
How to Use the AI Bikini Generator
Tip 1: Upload a clear, well-lit photo of yourself
The AI works best with photos where your full torso is visible and the lighting is even. Avoid heavily filtered or low-resolution selfies — the clearer the source image, the more natural the bikini replacement will look.
Change: Your input photo quality directly affects the output
Tip 2: Try different bikini tones by adjusting the prompt color
The default prompt specifies soft pastel pink or clean white. You can swap this to any solid color — "navy blue," "coral red," or "mint green" — by editing the color phrase in the prompt. Stick to solid colors for the most realistic fabric rendering.
Change: Replace "soft pastel pink or clean white" with your preferred color
Tip 3: Keep accessories visible for a more natural look
The prompt preserves jewelry, watches, and hair clips by default. If you want a cleaner look, add "remove all accessories" at the end of the prompt. Otherwise, leaving them in adds authenticity.
Change: Add or remove the accessories instruction at the end of the prompt
Common Pitfall: Using photos with heavy overlapping arms or crossed-body poses — the AI struggles to separate clothing from limbs in complex occlusion scenarios, resulting in blurred or missing body sections.
Frequently Asked Questions
Can I use this with any photo, or does it only work with certain poses?
It works with most standard poses where the torso is visible. Front-facing and slight-angle shots produce the best results. Extreme side profiles or heavily cropped photos may cause incomplete clothing replacement.
Why does the prompt specify "no skin smoothing" and "no body reshaping"?
These constraints keep the output faithful to your actual appearance. Without them, the AI tends to default to idealized body proportions and airbrush-smooth skin, which makes the result look synthetic rather than natural.
What image resolution works best for a clean result?
Photos at 1024px or higher on the shorter side produce the sharpest bikini fabric detail. Lower resolution images still work but may show softer edges where the bikini meets skin.