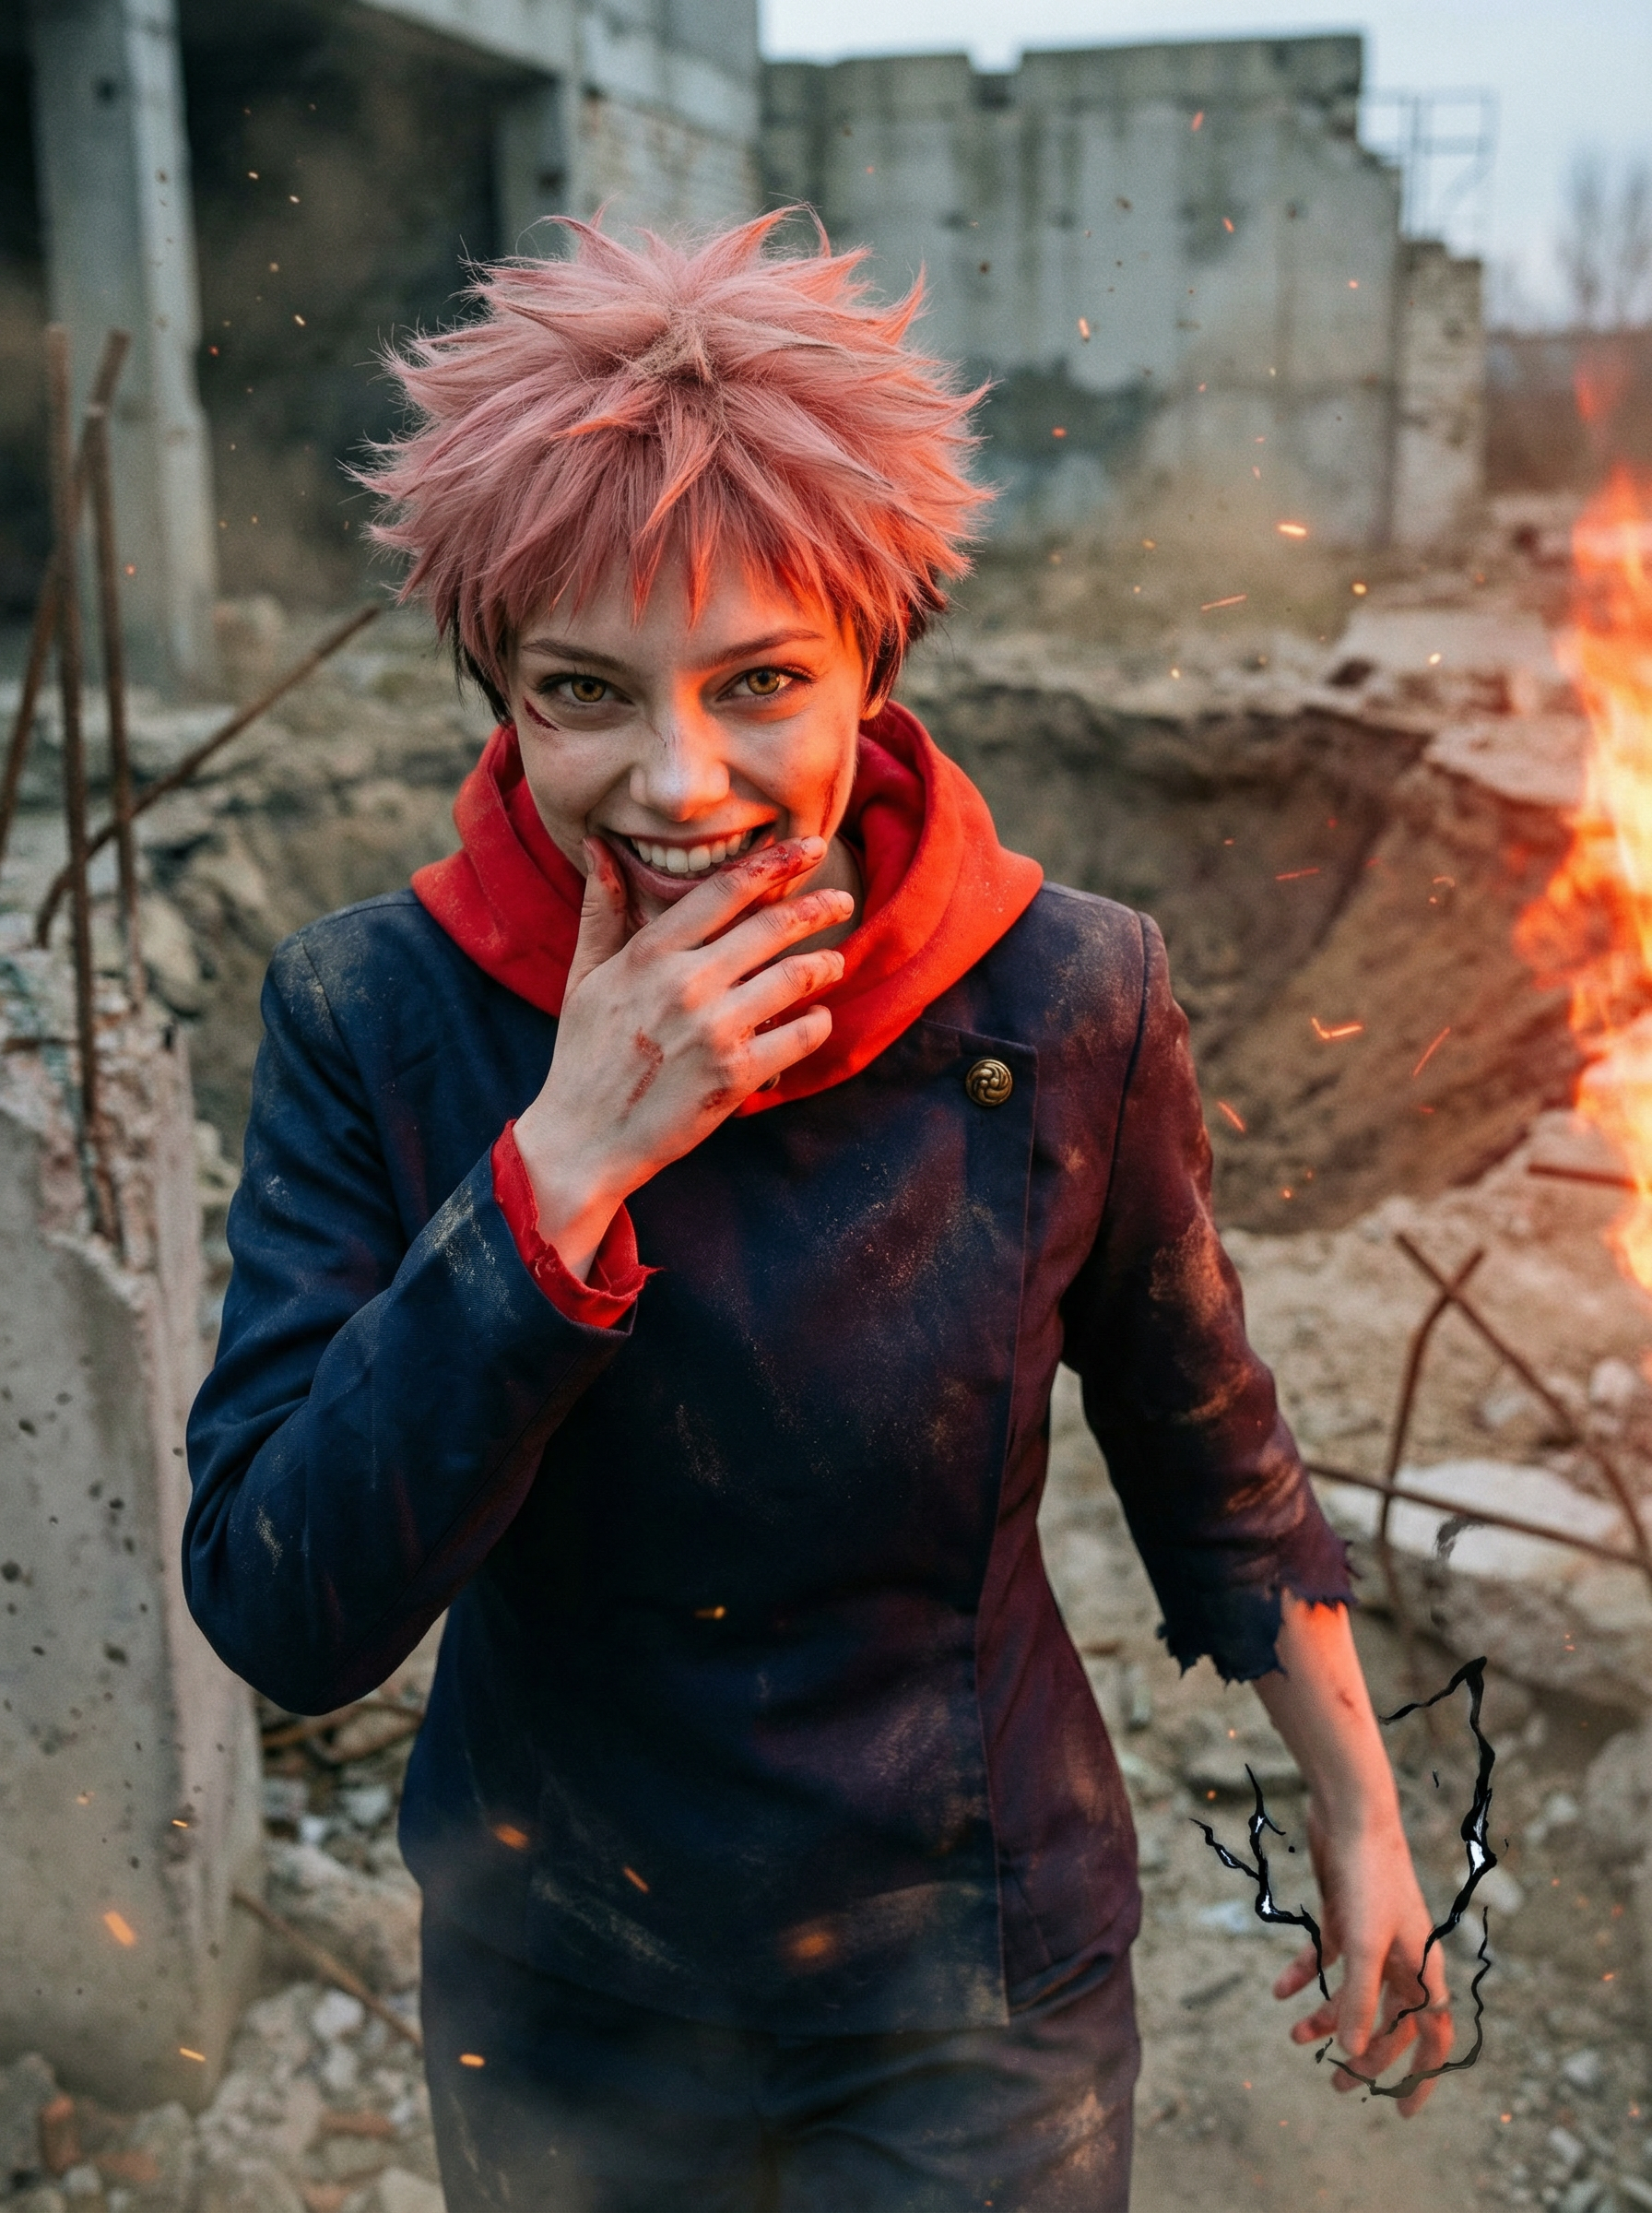
What Makes the Yuji Itadori Fight Portrait Work?
The signature of this portrait is the expression — not pain, not rage, but pure exhilarated battle joy. That wide grin, teeth slightly showing, eyes blazing, is Itadori's defining psychological trait: he enjoys the fight. Most action portraits default to intensity or menace. This one commits to charisma, which reads differently at a scroll-stop level — the smile creates unease because it signals someone who does not fear the situation.
The split lighting architecture reinforces this: fierce orange-red firelight on one side, cool blue-grey shadow on the other. This is not ambient lighting — it is a battlefield event still in progress. Combined with the 3/4 body mid-stride composition, debris still settling, and residual energy crackling at the fingers, the frame freezes the exact moment between finishing a fight and choosing to enjoy the aftermath.
The color palette — burnt orange, steel grey, blood crimson — is gritty and desaturated in the midtones, which pushes the vivid highlight colors (the fire light, the floating energy particles) into sharp relief. The result reads more like war photography than cosplay.
Key Insight: The battle-joy expression is load-bearing. Replacing the grin with standard intensity (furrowed brow, set jaw) turns this into a generic fight portrait. Itadori's exhilarated smile is what separates him from every other shonen battle character — do not neutralize it when customizing.
How to Customize Your Yuji Itadori Fight Portrait
Tip 1: Shift the Battle Phase
The current result is post-impact — energy dissipating, blood at the corner of the mouth, forward walk through settling debris. For a pre-impact variant, swap the body action directive to a charging pose. The expression can stay the same — Itadori's grin reads in both phases.
Change: "caught mid-stride walking forward through settling debris, right hand loosely flexing fingers as residual energy crackles" → "surging forward, right arm pulled back with compressed energy, weight shifted onto front foot"
Tip 2: Dial the Battle Damage Up or Down
The current prompt adds a torn sleeve edge, dust on shoulders, and a small cheek scratch. For a pre-fight look, remove the damage section entirely. For a more ravaged post-many-rounds version, escalate to heavily torn jacket, visible jaw bruising, and multiple cuts across the arms.
Change: "subtle battle damage: a torn sleeve edge, dust on shoulders, a small scratch across one cheek with a thin line of blood" section
Tip 3: Swap the Battlefield Environment
The demolished concrete arena can be replaced with other JJK locations. Try "domain expansion interior: an infinite void space with blood-red cursed energy flooding the ground plane" for a supernatural setting, or "rain-soaked Tokyo rooftop, neon city lights blurred below" for an urban night fight.
Change: "Demolished concrete battlefield, rebar jutting from crumbled walls, dust clouds still settling" section
Common Pitfall: Requesting a full-body shot breaks the portrait's emotional read. This prompt is calibrated for a 3/4 body frame — the hand-to-face proportion and the expression-as-focal-point only work at that framing. Full-body at the same energy level turns a character study into a poster, and the grin loses its impact.
Frequently Asked Questions
Can I use this with my own photo even if I don't look like Yuji Itadori?
Yes — the prompt preserves your exact facial features from your uploaded photo regardless of resemblance to Itadori. Hair color, eye color, and clothing are transformed by the model on top of your face. Upload any face and the character transformation applies without altering your underlying features.
Why use split orange-red and cool blue-grey lighting instead of a single light source?
Split complementary lighting creates a visual separation between the active event side (the explosion, the energy) and the shadow side (the implied space the opponent occupies). It is a film poster technique that makes a single subject read as existing inside an ongoing event rather than standing against a backdrop. Bilateral lighting would collapse the scene into a flat studio look.
What kind of photo gives the best result?
A clear frontal or slight 3/4 angle face photo works best — the model needs sufficient facial data to transfer your features accurately. Avoid heavily filtered photos, extreme side profiles, and photos where large sunglasses or hair obscure your face. Natural lighting with a plain or simple background gives the model the cleanest input.