0:00 / 0:00
▶
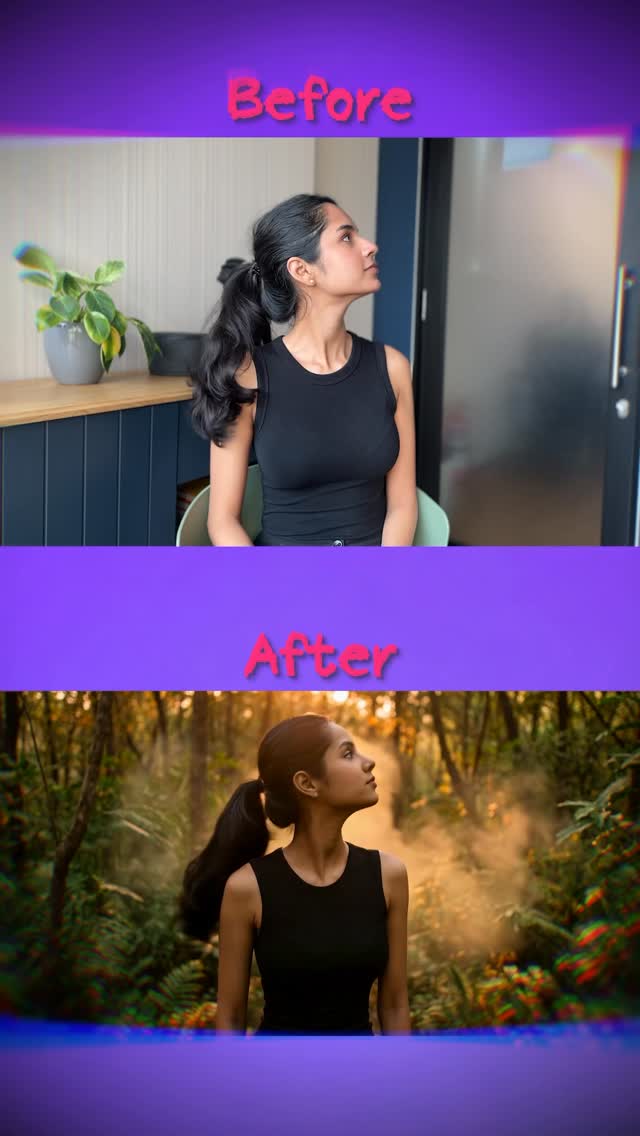
This tutorial by creator @cyborggirll is a masterclass in cinematic AI background replacement. By leveraging the power of "Video-to-Video" AI tools like Kling and image generators like Banana 2, she demonstrates how an indie creator can transform a mundane indoor setting into high-production environments like a misty forest, a vast desert, or the neon-lit streets of Times Square. The video uses a high-contrast "Before vs. After" hook that immediately captures attention, followed by a clear, actionable workflow that demystifies complex AI processes for a non-technical audience. The aesthetic is clean, professional, and highly aspirational, making it a perfect example of how AI can bridge the gap between low-budget setups and premium visual storytelling.
The video features a young South Asian woman with dark hair tied in a sleek ponytail, wearing a simple black sleeveless top. This minimalist wardrobe choice is strategic; it provides clear silhouettes for the AI to track and modify without complex fabric physics issues. The "Before" shots are filmed in a standard home office with a plant and a bookshelf, while the "After" shots showcase the AI's ability to maintain subject consistency while completely overhauling the environment, lighting, and color grade.
| Time Range | Visual Content | Shot Language | Lighting & Color | Viewer Intent |
|---|---|---|---|---|
| 00:00–00:03 | Rapid-fire split-screen "Before/After" comparisons (Forest, Desert, Times Square). | Static split-screen; high-speed cuts. | Warm indoor vs. cinematic outdoor grades. | The Hook: Instant proof of value and visual "wow" factor. |
| 00:04–00:07 | Creator speaks directly to the camera holding a small microphone. | Medium Close-Up (MCU); eye-level. | Natural, soft window lighting; neutral tones. | Establish Authority: Introduce the tutorial concept. |
| 00:08–00:14 | Screen recording of the "silly" base video being filmed. | POV / Screen recording. | Standard smartphone camera look. | Relatability: Show the "unpolished" starting point. |
| 00:15–00:19 | Interface of Banana 2 generating the background image. | UI walkthrough. | Dark mode interface; high contrast. | Instructional: Show the first tool in the stack. |
| 00:20–00:28 | Interface of Kling AI processing the video-to-video generation. | UI walkthrough. | Software UI. | Instructional: Show the core "magic" step. |
| 00:29–00:36 | Using ChatGPT to generate and refine prompts. | UI walkthrough. | Clean text-based UI. | Value Add: Solve the "what do I type?" friction point. |
| 00:37–00:40 | Creator concludes with a CTA and "The Cyborg Girl" logo. | MCU with text overlays. | Soft, flattering indoor light. | Retention/Growth: Brand reinforcement and follow prompt. |
This video taps into the "AI Democratization" trend. It takes a high-end visual effect—something that previously required a green screen, a VFX team, and hours of rotoscoping—and packages it as a simple two-step process for anyone with a smartphone. The "Before/After" format is a psychological goldmine; it triggers curiosity (how did she do that?) and provides immediate gratification. By showing herself acting "silly" in the base video, the creator lowers the barrier to entry, making the viewer feel like they could easily replicate the results.
From a platform perspective, the video excels in Watch Time and Saveability. The fast-paced editing and rapid transitions in the first 3 seconds ensure users don't scroll past. The tutorial nature of the content makes it highly "saveable," as users will want to refer back to the tool names (Banana 2, Kling) and the specific prompt structures shown. The use of trending AI tools like Kling, which is currently a hot topic in the creative tech space, helps the video ride the wave of platform-wide interest in AI content.
Option 1: The "Value First" Approach
How to travel the world without leaving your room. 🌍✨
1️⃣ Record a base video.
2️⃣ Use Banana 2 for the background.
3️⃣ Animate with Kling AI.
Which location should I try next? Comment below! 👇
#AIvideo #KlingAI #ContentCreatorTips
Kling AI for video-to-video and Banana 2 or Midjourney for the initial background image replacement.
"Cinematic," "Ultra-realistic," and "Natural lighting" are key for high-end results.
Ensure your base video has clear lighting and you use a high-strength "Character Reference" setting in the AI tool.
Keep the motion subtle and ensure the lighting on your face in the base video matches the lighting in your prompt.
Instagram prefers the high-aesthetic "Before/After" look, while TikTok favors the "Step-by-Step" tutorial breakdown.
Use the platform's "AI-generated" label and mention the tools in your caption to build trust with your audience.