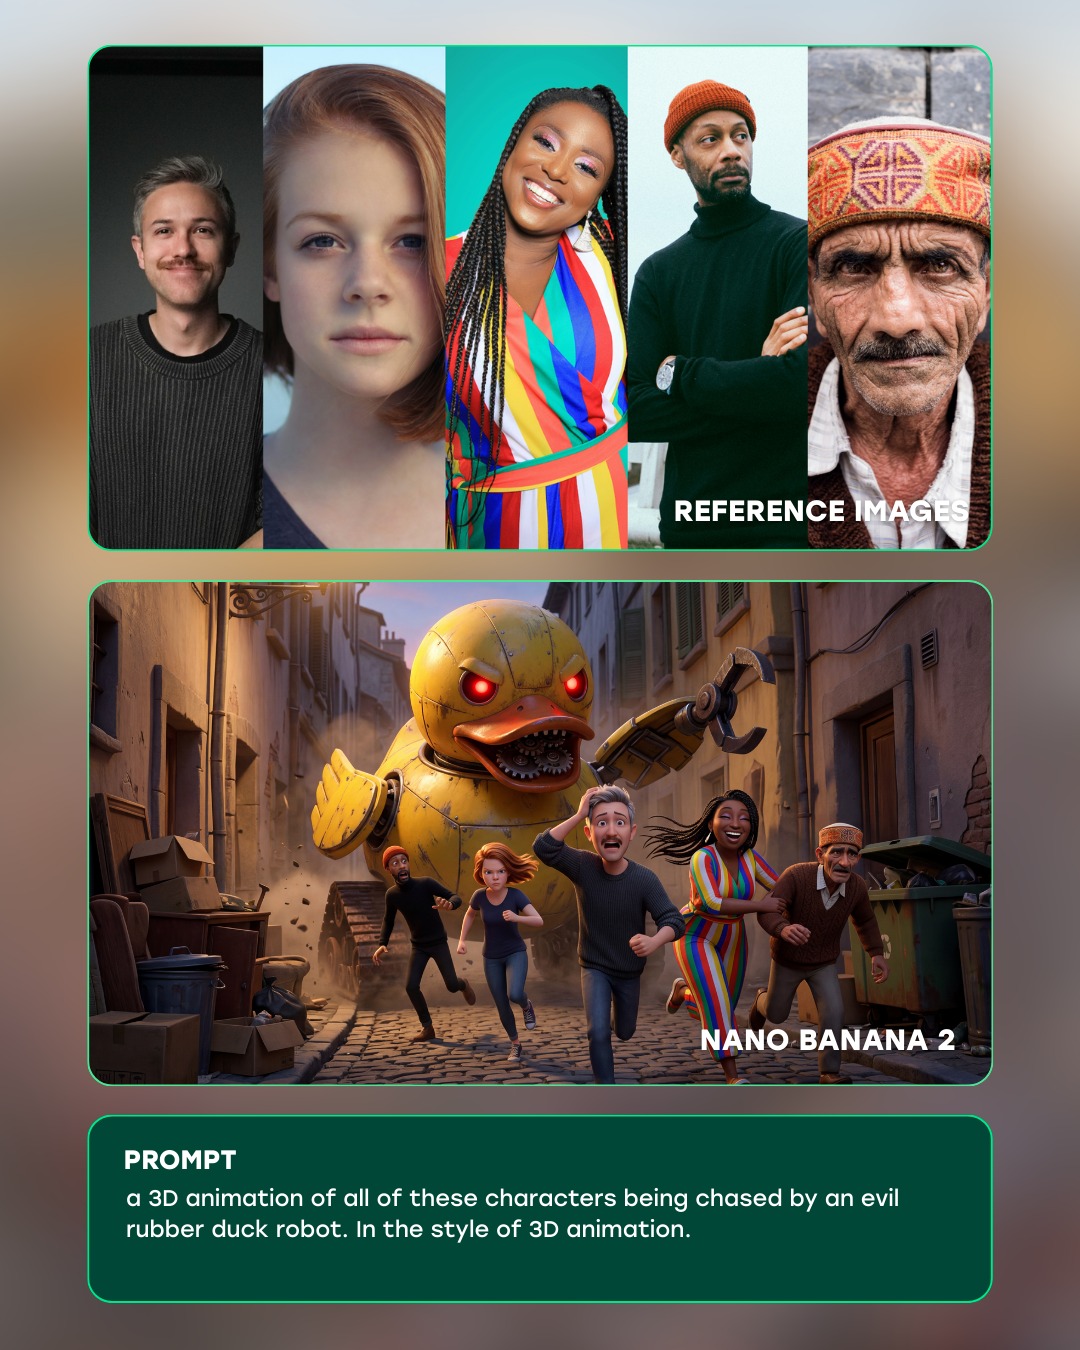
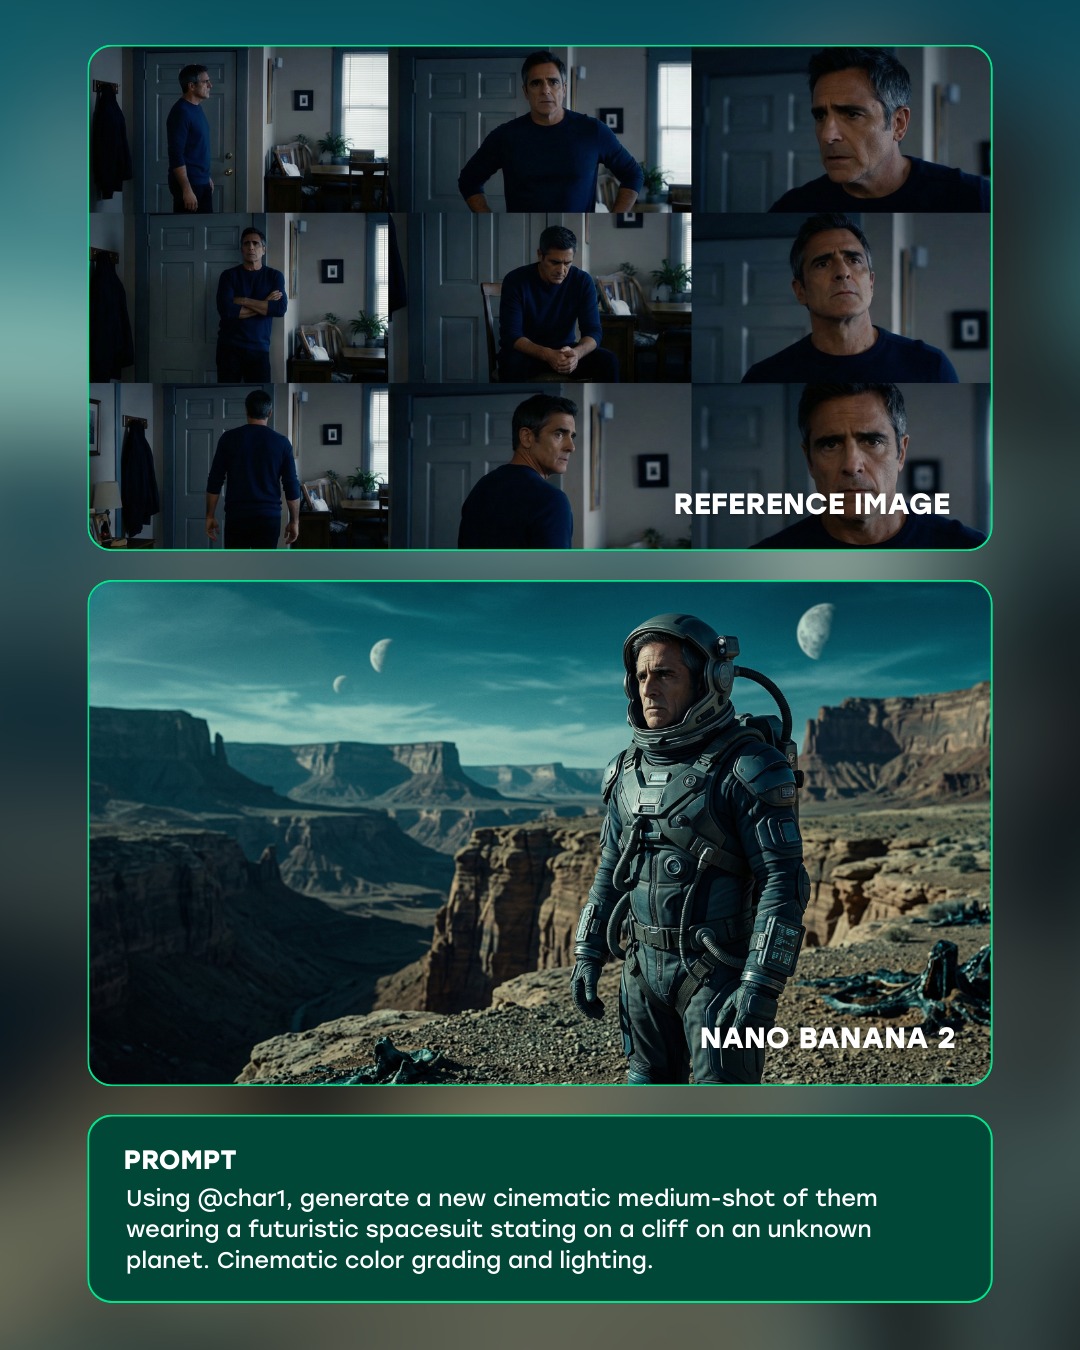
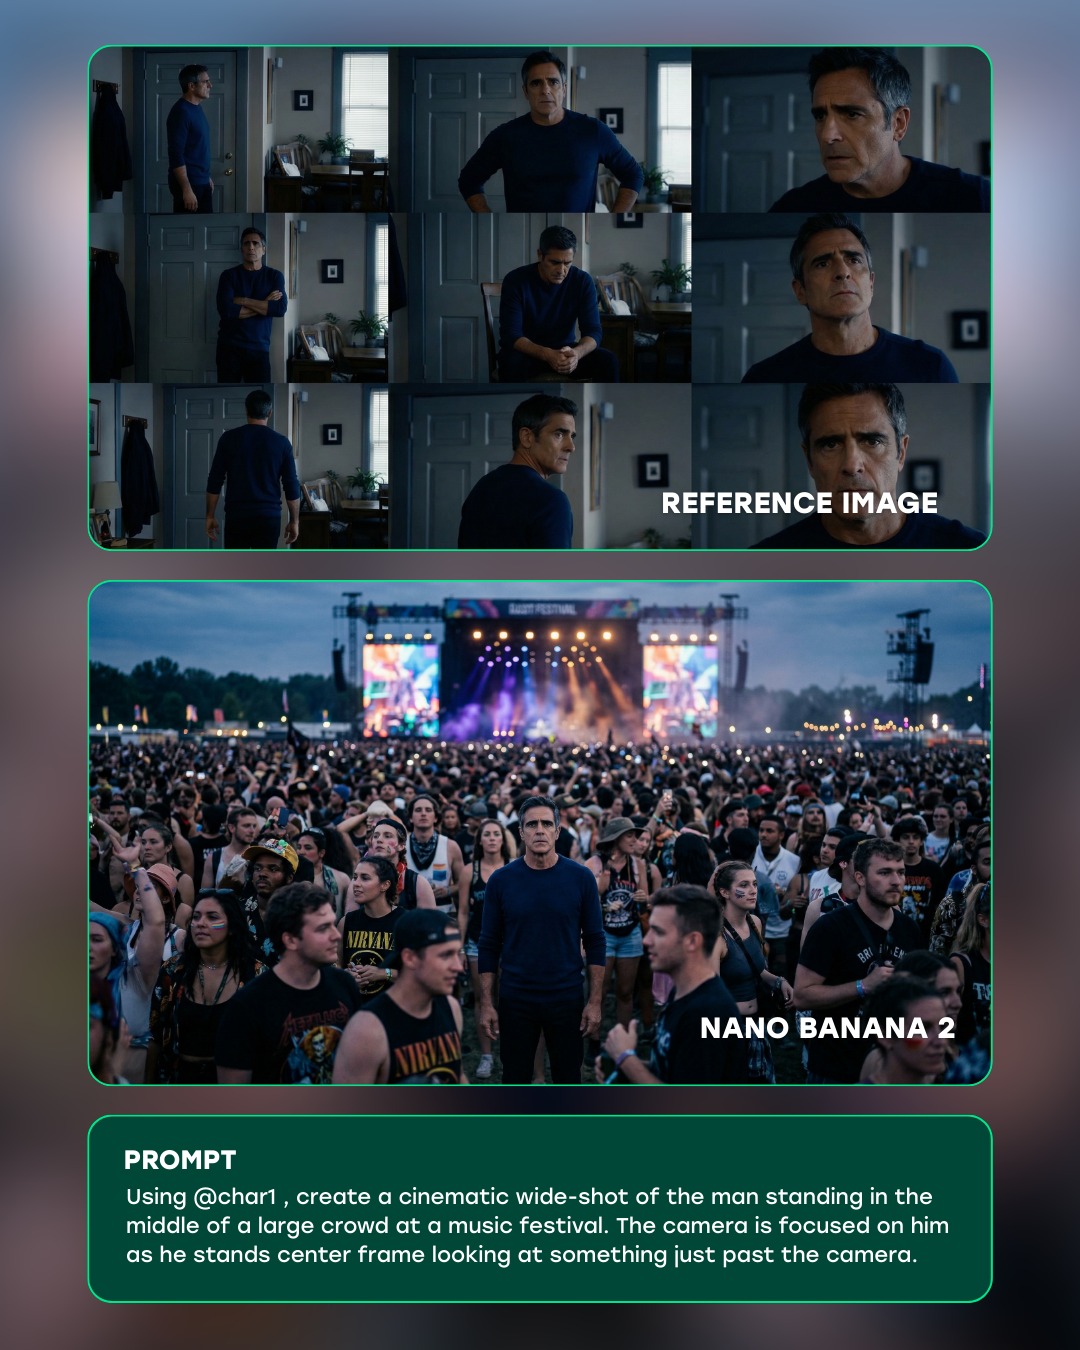
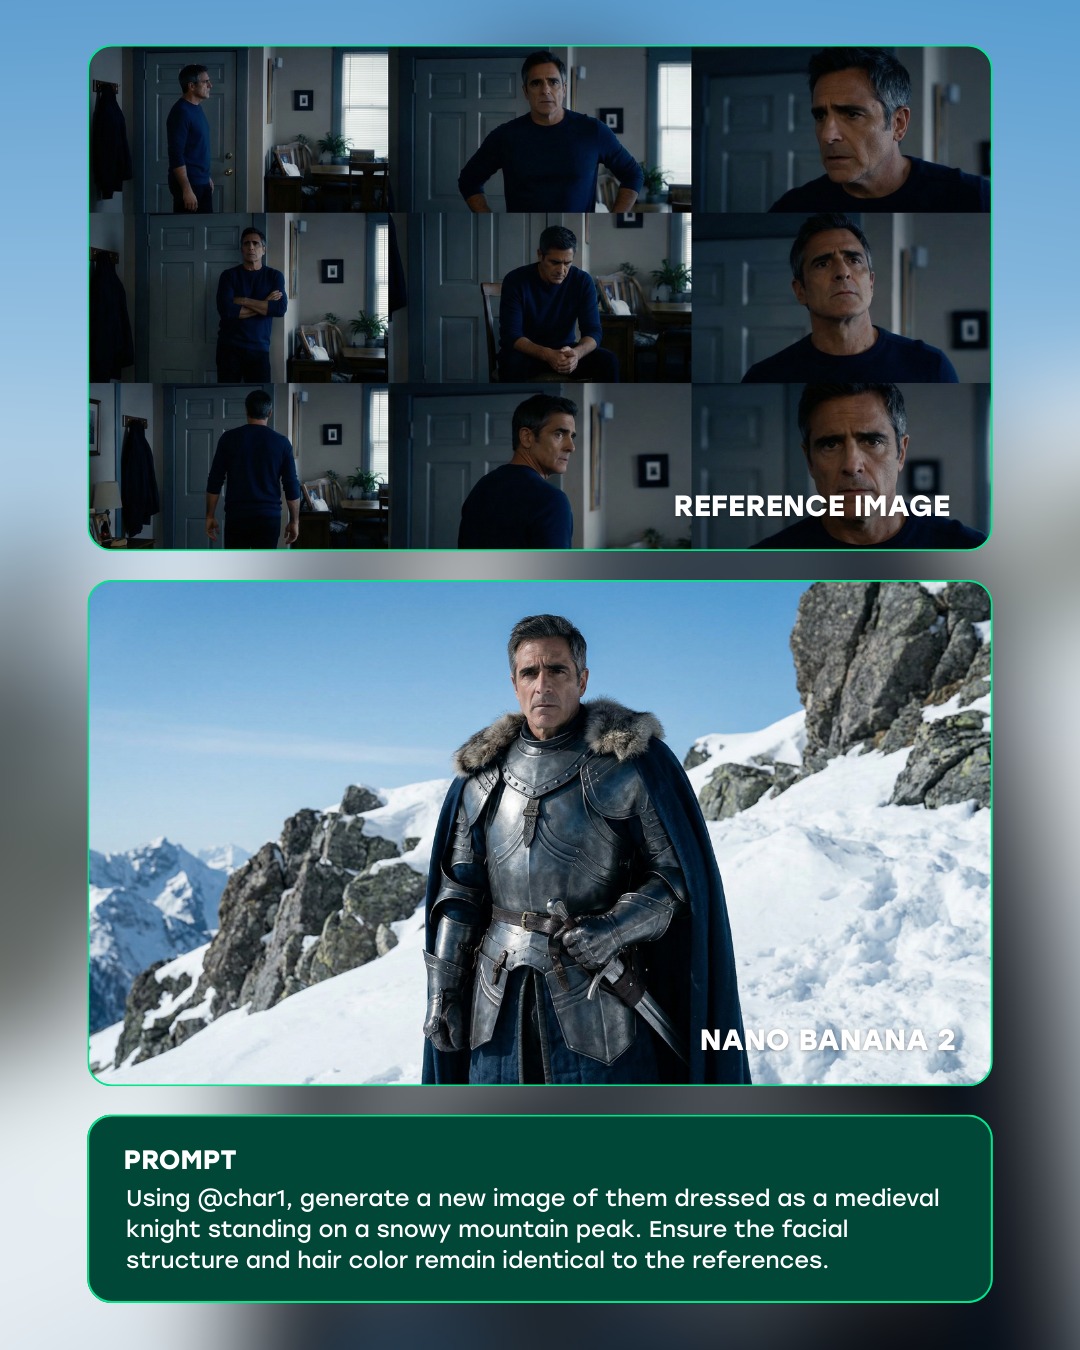
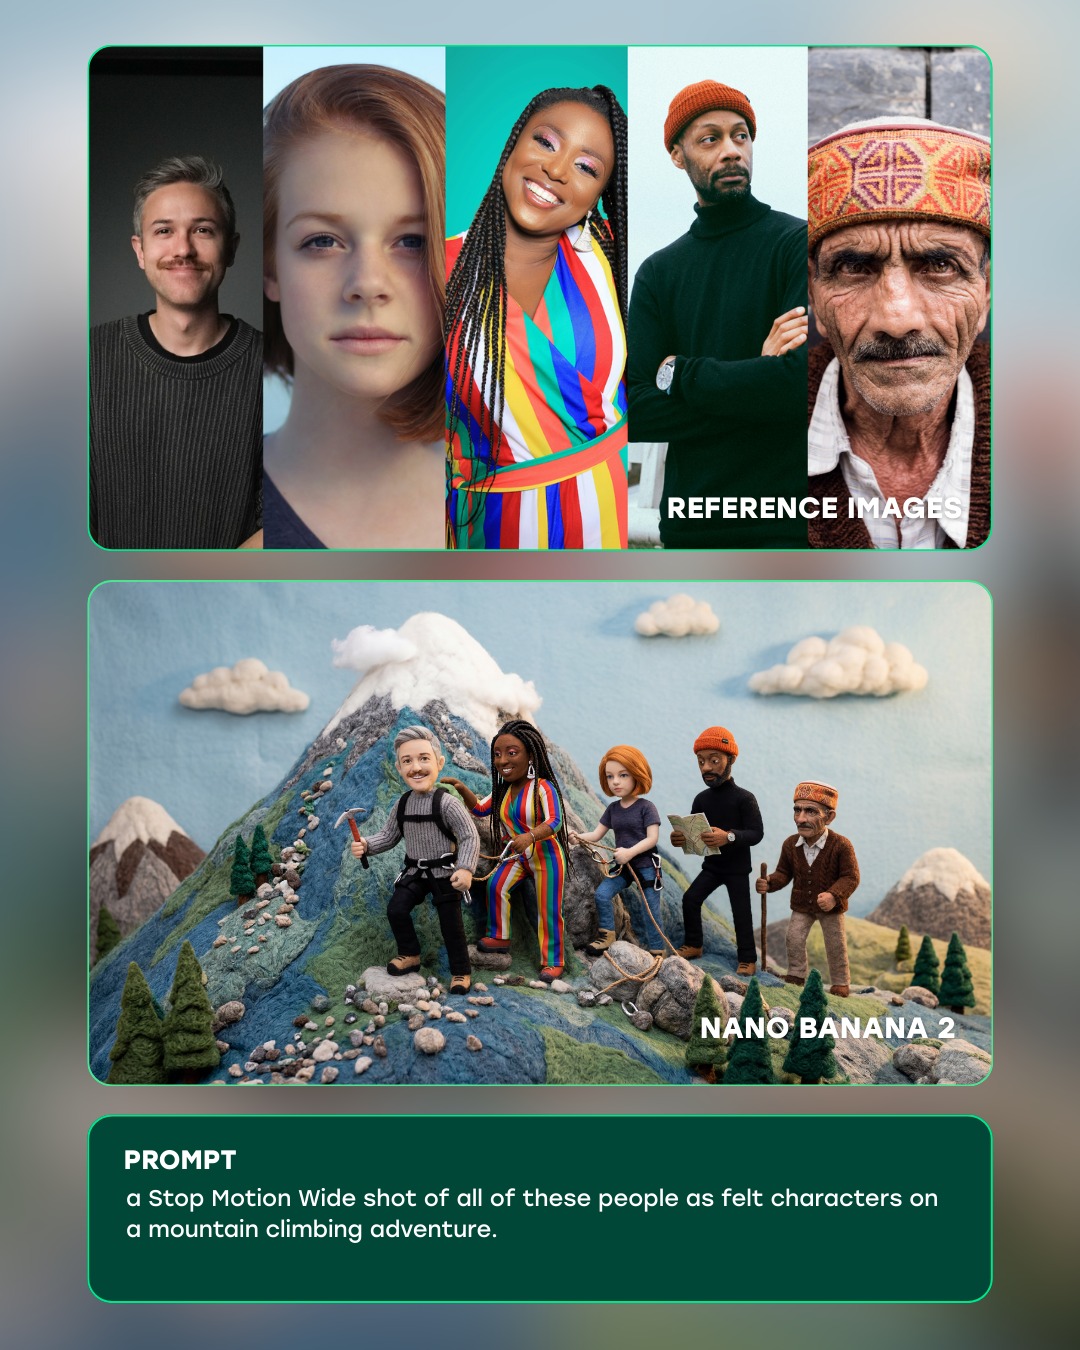
This image is effective because it does not stop at showing a polished result. It teaches the viewer how the result was assembled. That instantly gives it more value than a simple character image post. The reference portraits at the top, the generated character scene in the middle, and the prompt or workflow block at the bottom create a visual argument: inputs matter, process matters, and the final image can be studied rather than only admired.
For creators, that kind of structure is especially useful because it shortens the distance between inspiration and action. A viewer does not need to guess how the look was built. The post already contains a method. That makes it naturally more saveable, more teachable, and more discussion-friendly than output-only content. When people can see both the references and the result, the post becomes a reusable learning asset instead of a one-time visual.
Why the format is stronger than a single-image share
A single good image can get attention, but a process graphic has a different advantage: it gives the audience a reason to stay longer. The eye moves through stages. First the viewer inspects the reference row, then compares it to the generated result, then scans the text block to understand what was preserved and what was transformed. That layered reading path increases engagement because the post rewards curiosity rather than ending at first glance.
The educational framing also makes the content more trustworthy. In AI image circles, many viewers are skeptical of perfect outputs when there is no visible process behind them. A before-and-after workflow image reduces that skepticism because it surfaces the structure behind the result. It says, in effect, this was built intentionally, and here is the logic. That is one reason process posts often outperform pure beauty posts among creator audiences.
How the visual hierarchy supports learning
The top row of references gives the post a strong entry point. It tells the viewer what visual DNA is being carried into the final image. The middle panel then functions as proof: this is what the references became when translated through prompt control and generation logic. The bottom text block completes the cycle by turning the visual relationship into a repeatable technique. That three-part structure is exceptionally strong for educational content because it converts a visual result into a teachable pattern.
The hierarchy also helps with scanning on mobile. The viewer can understand the post in a descending order without needing to interpret a complex diagram. Inputs on top, output in the middle, method at the bottom. That is an excellent creator template because it keeps the logic visible even in fast social consumption environments.
Signal Table
| Signal | Evidence (from this image) | Mechanism | Replication Action |
|---|
| Process visibility | Reference portraits, generated result, and workflow text appear in one frame | Showing steps increases trust and perceived usefulness | Always include inputs and method blocks when sharing character-consistency workflows |
| Layered scan path | Top-to-bottom layout guides the eye naturally | Sequential reading increases dwell time and comprehension | Place inputs first, output second, explanation third |
| Comparative proof | Viewer can directly compare references to the generated scene | Side-by-side evidence turns abstract prompt advice into something concrete | Use at least 3-5 reference tiles whenever the goal is to teach character transfer |
| Actionable takeaway | Prompt or workflow block is embedded in the same card | Embedded instructions increase saves and reuse | Convert every process post into a mini teaching asset, not just a showcase |
Best-fit scenarios for creators
This kind of image is ideal for prompt engineering tutorials, character consistency threads, AI workflow explainers, creator newsletters, and blog posts aimed at helping smaller creators build repeatable visual systems. It is especially strong when the audience wants practical ways to stabilize a character across multiple scenes, outfits, or moods.
It is less ideal for pure portfolio presentation or art-first feeds where mystery is part of the appeal. Process graphics are generous by design. They prioritize explanation and transferability over mystique. That tradeoff is often worth it when your audience is composed of fellow creators, but it is less suited to presentation styles that rely on withholding method.
The same format also transfers easily to other niches. A product mockup workflow can replace character references with packaging references. A fashion creator can use outfit references instead of face references. A branding creator can use logo inspirations at the top and a final brand board in the middle. The template works because it is based on input-to-output logic, which is widely reusable.
Aesthetic read and why it feels clean
Even though the post is educational, it still works visually because the structure is disciplined. The references are contained, the middle result has enough space to feel aspirational, and the text area is treated like part of the design rather than an afterthought. That balance matters. If the text block looked too dense or the reference row felt chaotic, the whole card would read like clutter. Instead, the image keeps enough separation between sections to preserve clarity.
This is a useful reminder that instructional content still benefits from good graphic rhythm. Educational posts do not need to be plain to be legible. In fact, the best-performing creator explainers often borrow the pacing of editorial layouts: strong top section, satisfying center image, controlled information density below. That is exactly what this card is doing.
The before-and-after structure also creates its own aesthetic satisfaction. Humans like transformation stories, and this layout visualizes one in a very compressed form. It takes references, converts them into a generated result, and then offers the reasoning behind the conversion. That three-step reveal is emotionally satisfying as well as practically useful.
Prompt technique breakdown
| Prompt chunk | What it controls | Swap ideas (EN, 2–3 options) |
|---|
| reference portrait strip | Visual input set and identity baseline | outfit board strip, expression set strip, angle variation strip |
| final generated character scene | Proof of translation and aspirational output | hero poster result, fashion portrait result, cinematic still result |
| workflow/prompt block | Instructional value and save-worthy utility | parameter notes, step list, replication checklist |
| top-to-bottom card layout | Scanning order and comprehension rhythm | left-to-right infographic, carousel slide stack, split-panel teaching card |
| before-and-after comparison logic | Retention and process credibility | input-output grid, source-to-remix board, baseline-to-iteration board |
Execution playbook for remixing this idea
Start by locking three parts of the format before you worry about style polish: the input row, the output frame, and the explanation zone. Those are the functional anchors. After that, iterate one layer at a time. In practice, a good four-step build looks like this:
- Run 1: decide what counts as the input set and make the top reference strip clean and consistent.
- Run 2: choose one final output image that clearly proves the method worked.
- Run 3: rewrite the text block so it contains specific creator actions, not vague commentary.
- Run 4: refine spacing, labels, and contrast so the card stays readable on mobile.
This one-change discipline is important. Creator workflow posts get messy when the layout, instructional language, and image examples are all changed at once. By keeping the structure fixed and only adjusting one layer per revision, you learn what actually improves clarity and what only adds noise.
Final takeaway
The reason this graphic works is simple: it respects the viewer's desire to understand, not just consume. It shows inputs, it shows output, and it shows method. For creators trying to build a useful content library rather than a stream of isolated images, that is a powerful model. The most reusable post is often not the most beautiful final image. It is the clearest proof of how the image came to be.