How soy_aria_cruz Built This Crouching Pose Transfer AI
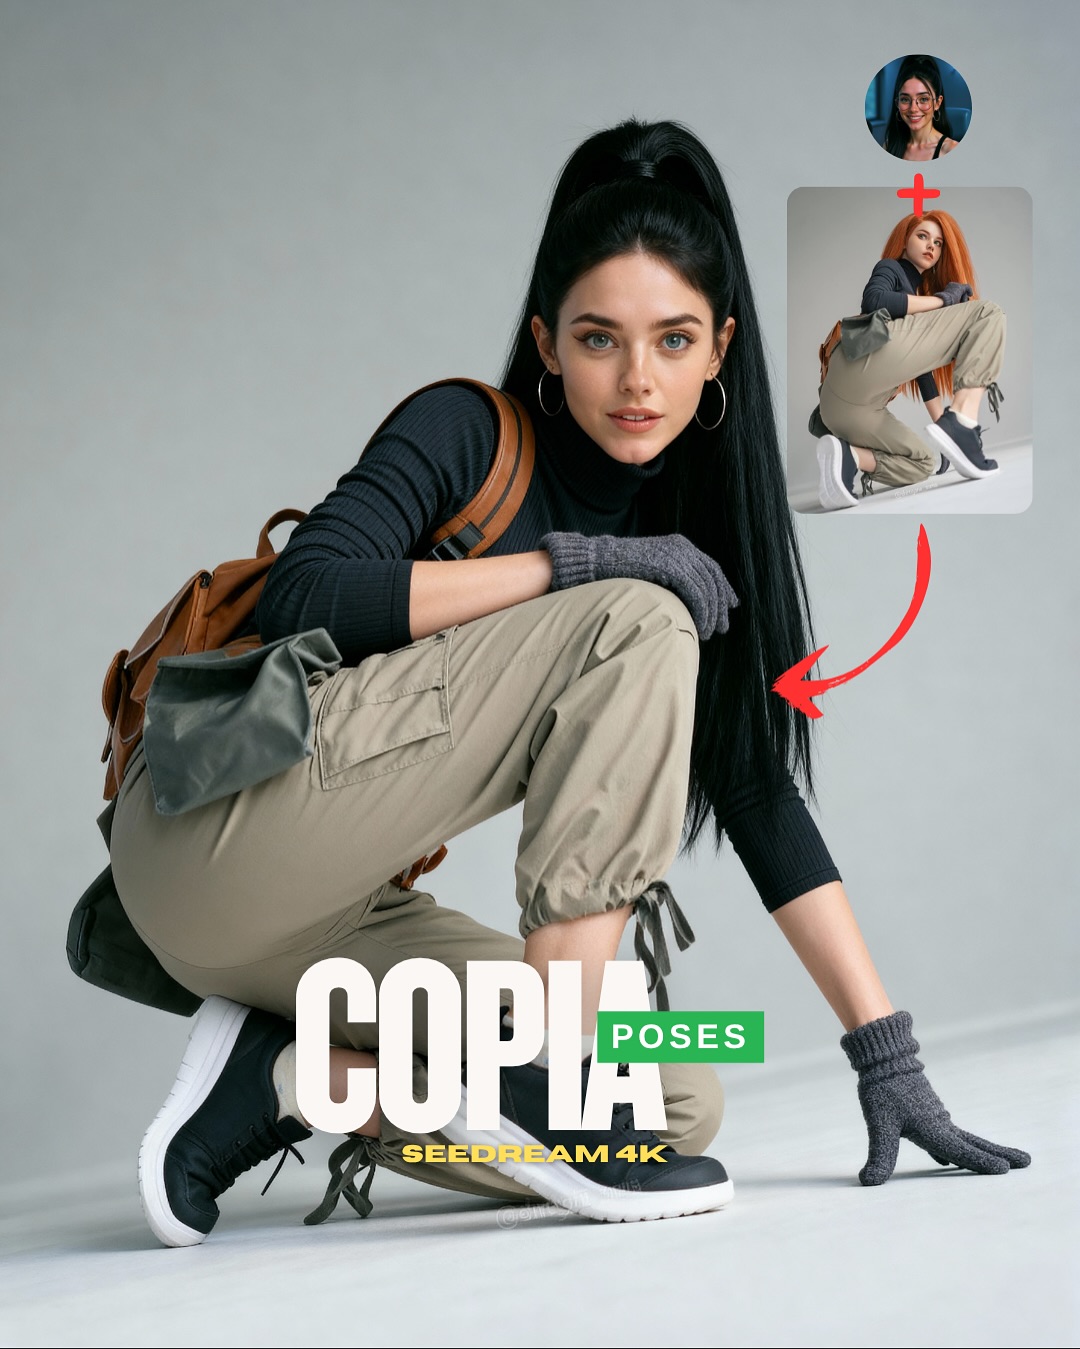
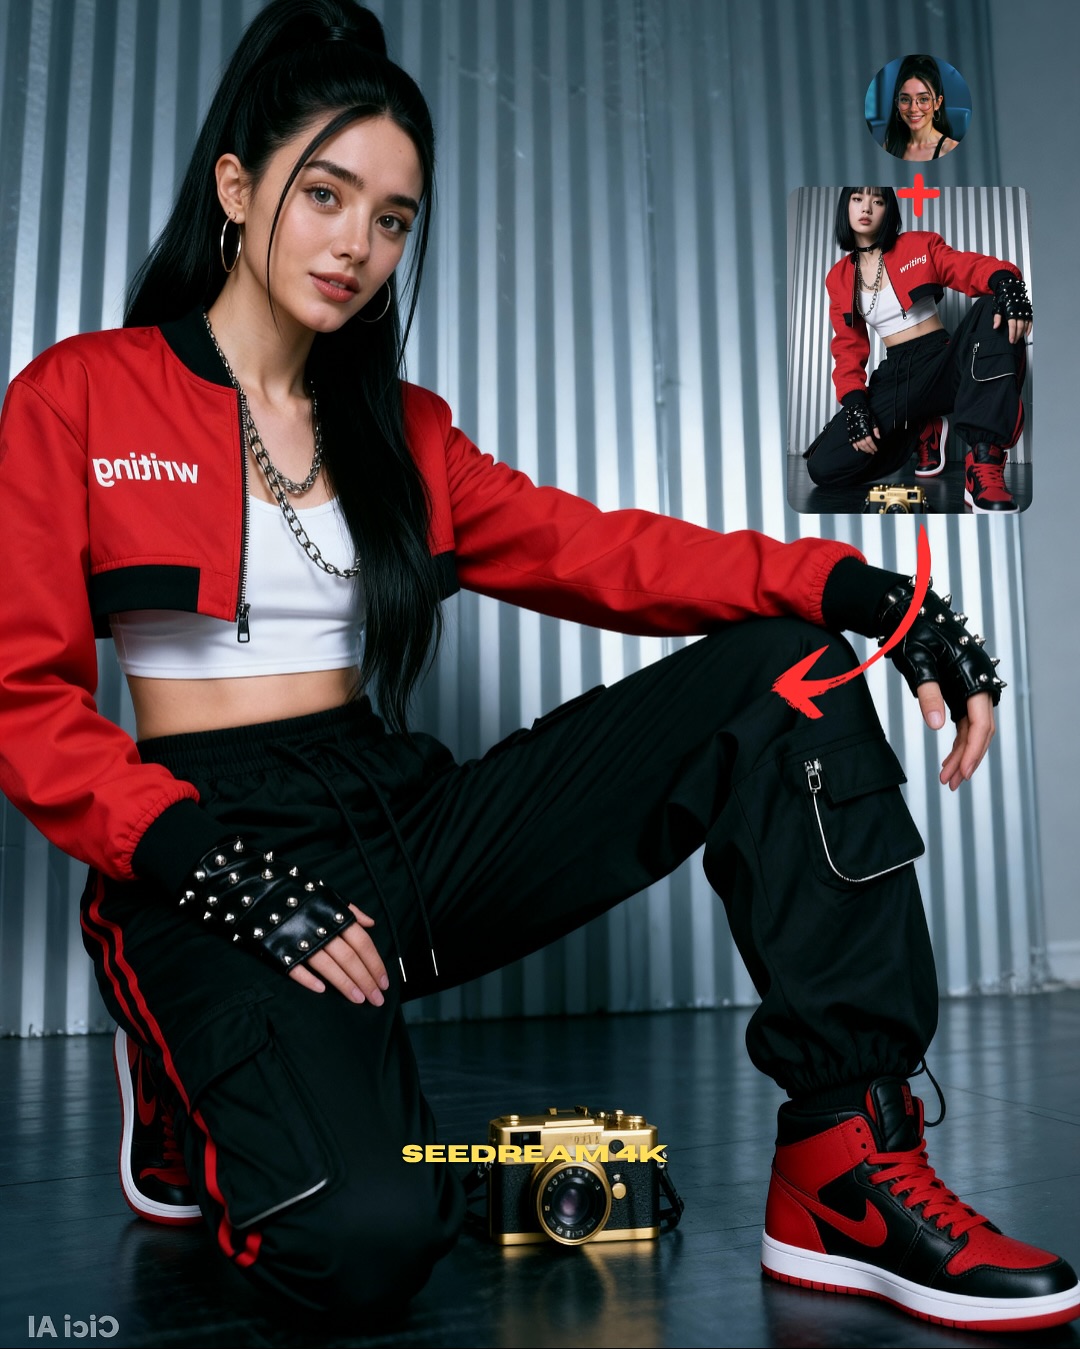
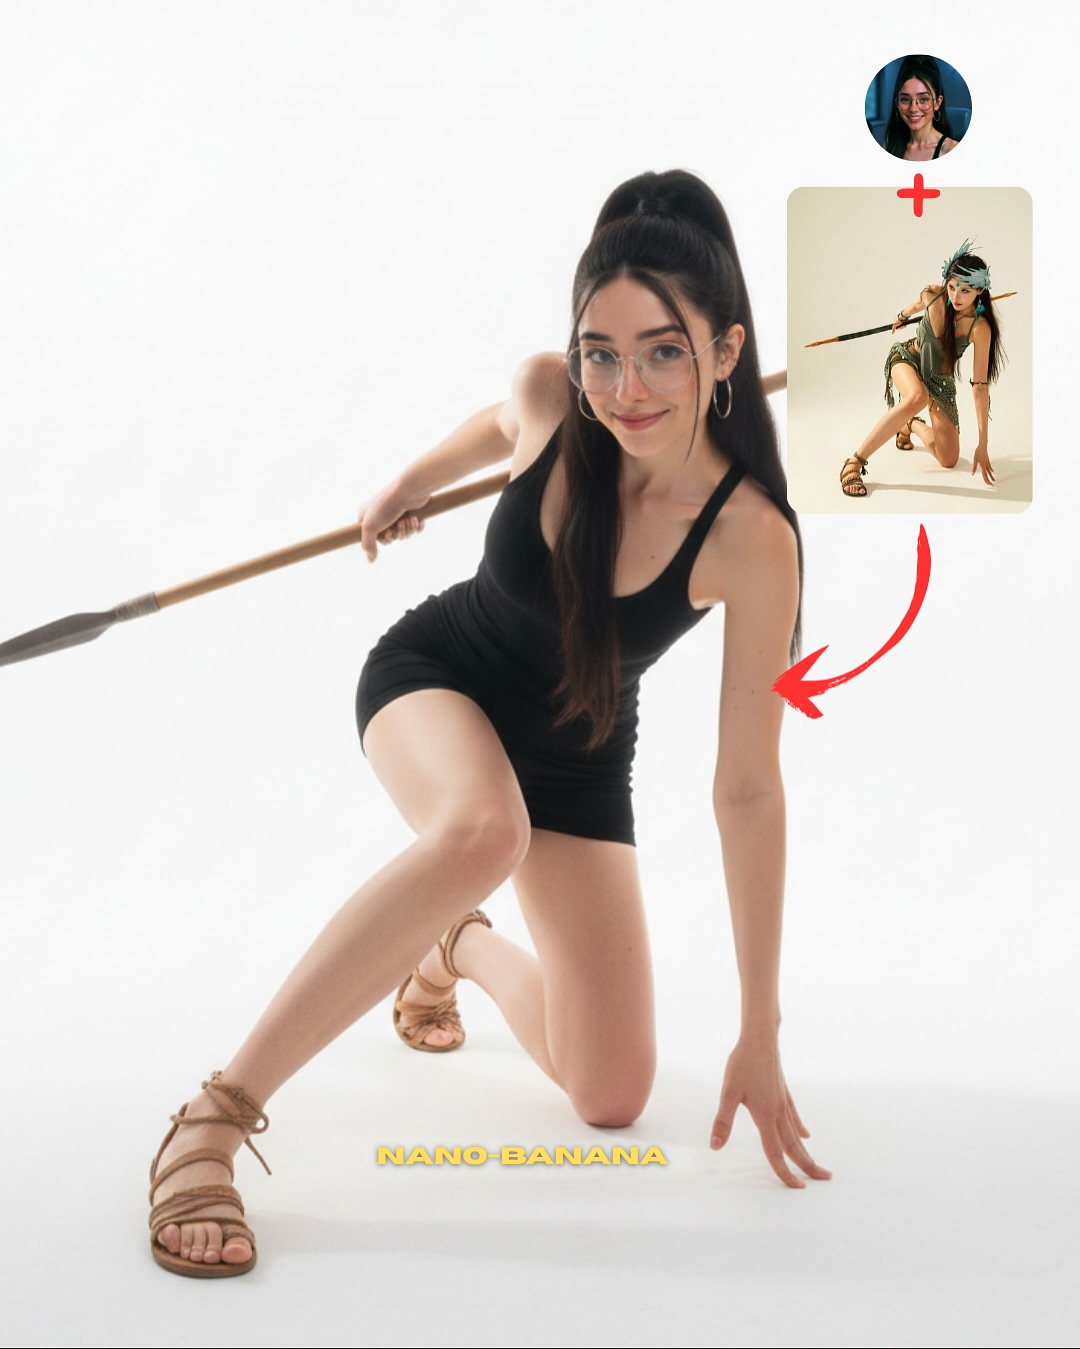
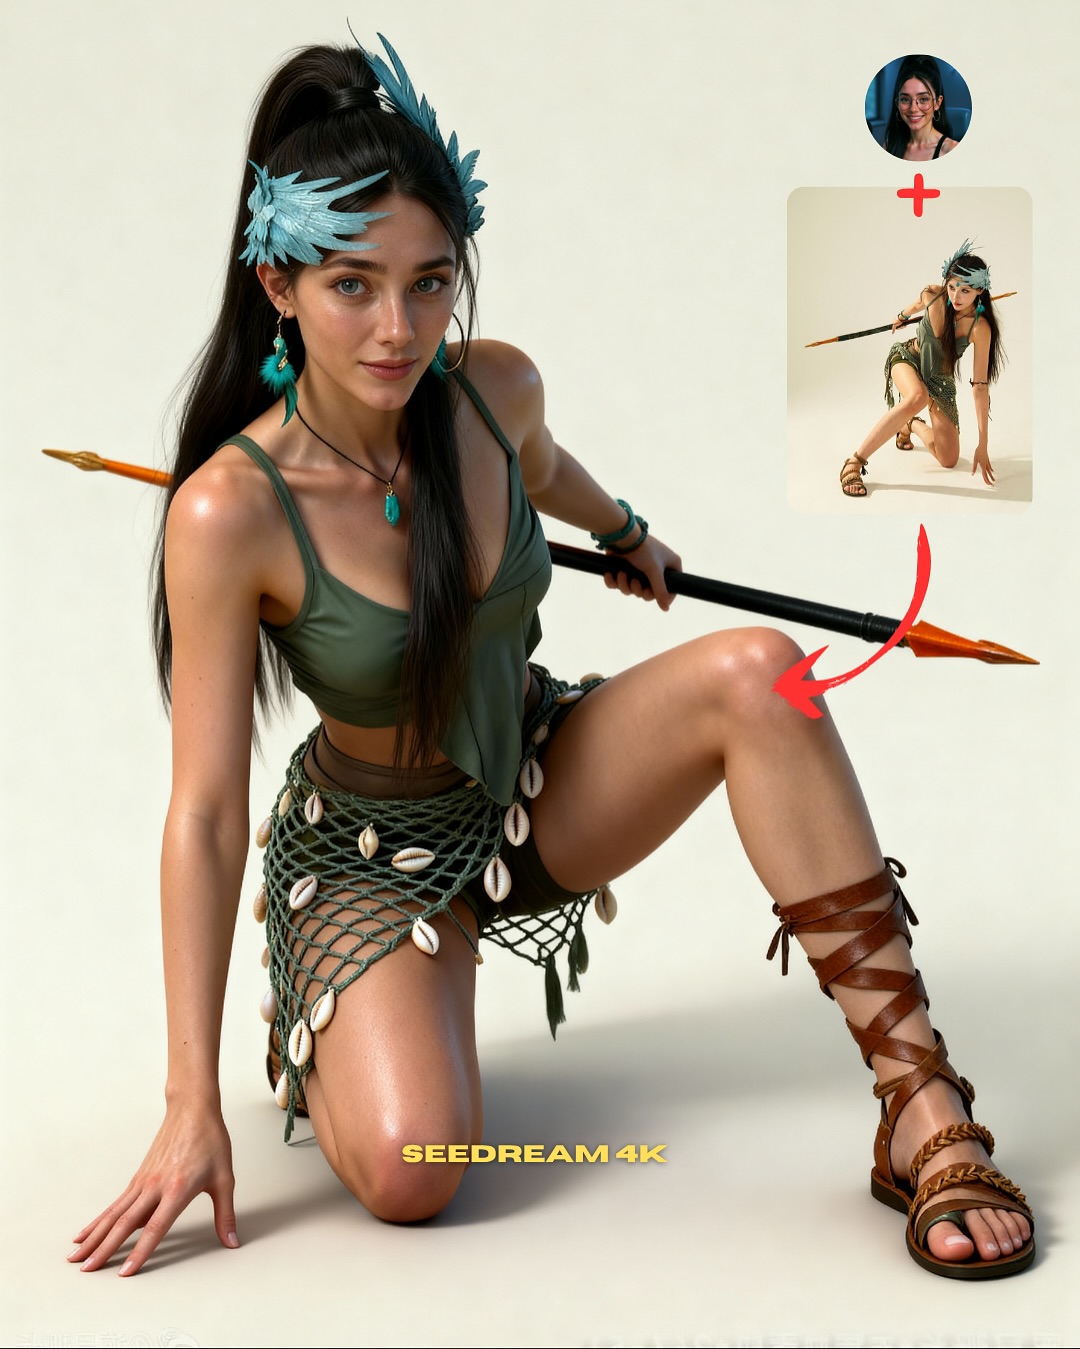
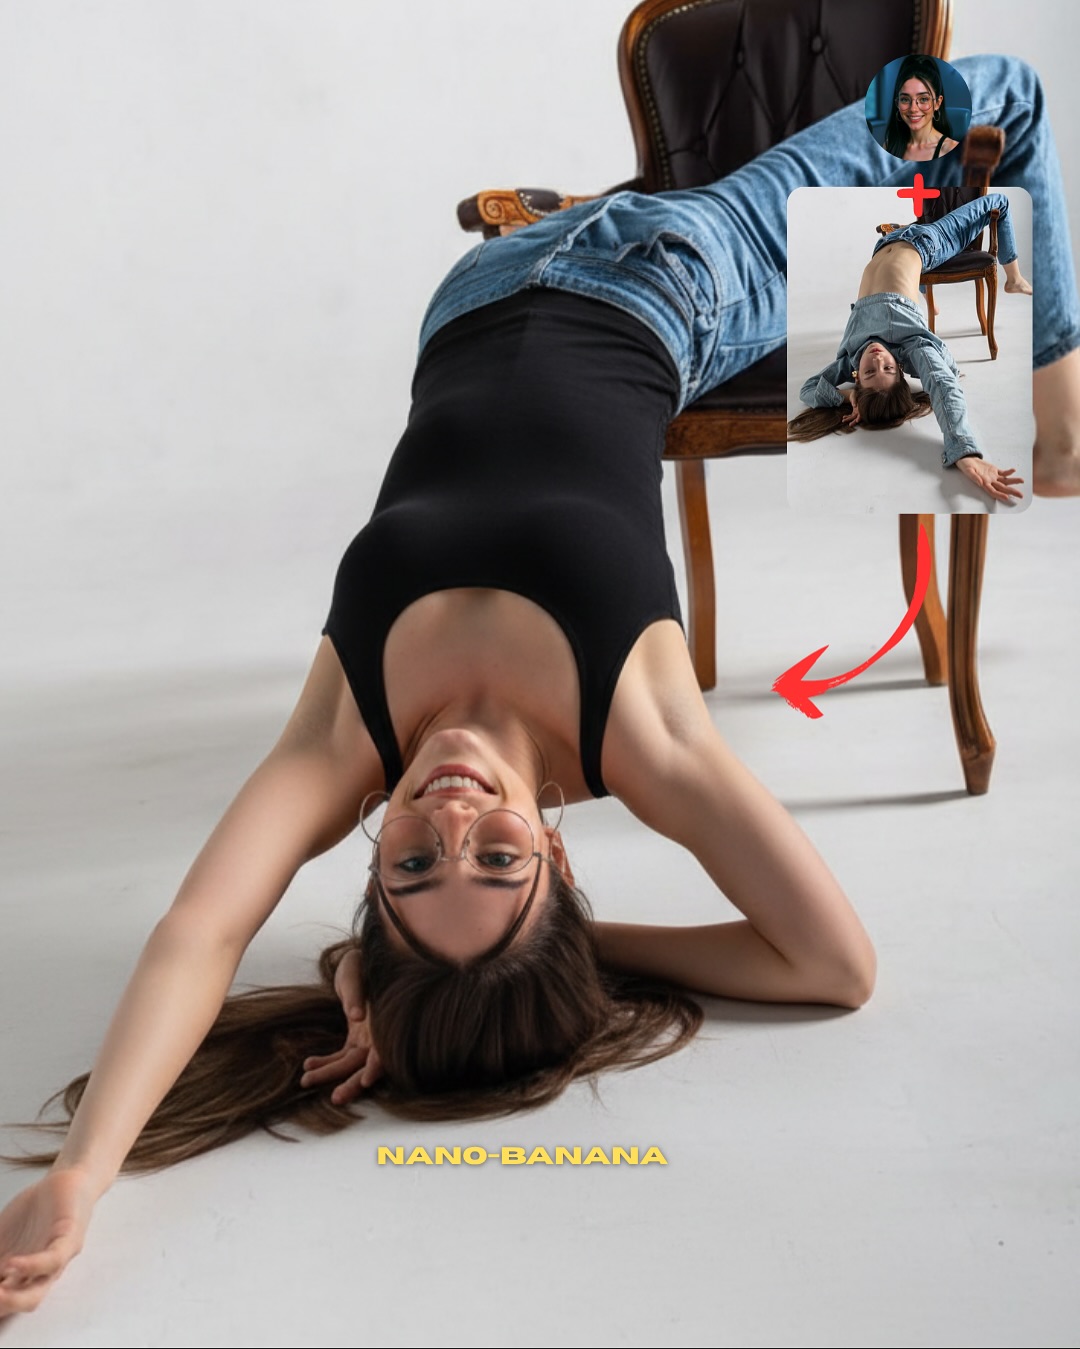
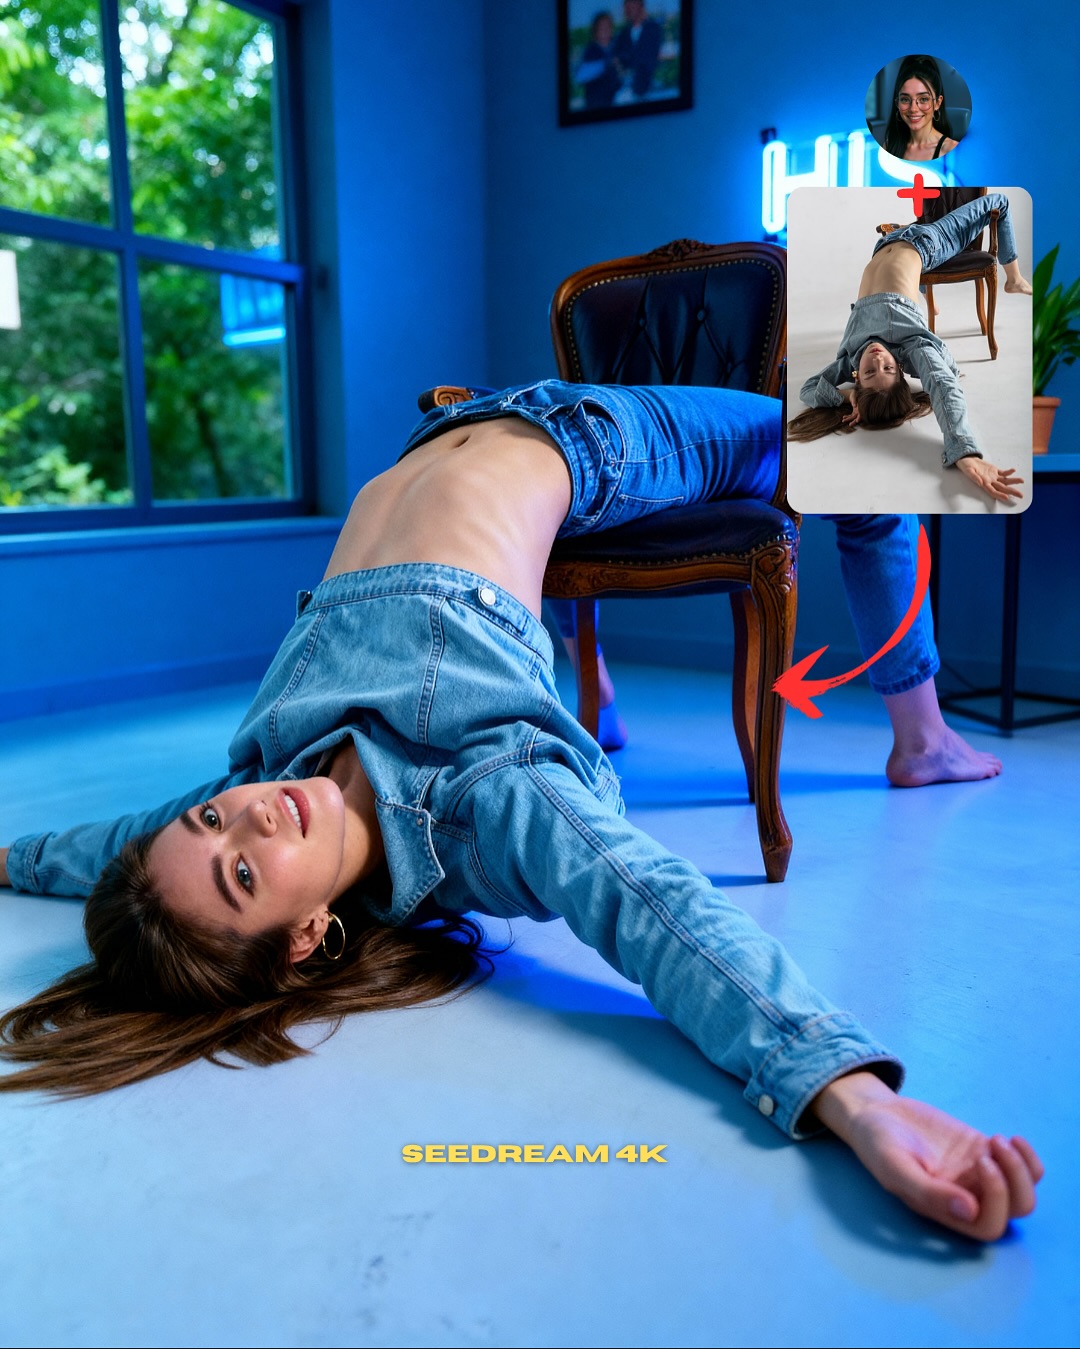
This image succeeds because it does not only show a good result. It teaches the workflow visually. The main crouching subject proves the output, the small source portrait clarifies whose identity is being used, and the reference inset plus red arrow explain where the pose came from. That is excellent educational packaging. A viewer can understand the method without needing to read a long caption first.
For creators, this is the difference between posting a cool image and posting a useful image. The best instructional visuals reduce explanation work. They let the image itself do part of the teaching. That usually makes them more saveable, because people keep them as a quick reference rather than treating them as disposable inspiration.
Why the layout is effective
The strongest mechanism here is role separation. The main image is the result. The small circular portrait is the identity source. The inset is the pose source. The arrow explains the transfer logic. Because each element has one job, the graphic stays easy to understand even though it contains multiple layers of information.
The pose choice helps too. A crouching body position is difficult enough to make the result impressive. It shows joint articulation, garment tension, and balance all at once. That makes the post more convincing as a demonstration of capability than a simple standing pose would.
| Signal | Evidence (from this image) | Mechanism | Replication Action |
|---|
| Visual workflow clarity | Identity source, pose source, arrow, and final result all appear in one frame | Viewers understand the process without reading extra instructions | Design tutorial posts so each visual component represents one workflow ingredient |
| High-difficulty pose proof | The final subject holds a deep crouching pose with believable balance | Complex body positioning makes the transfer result feel more impressive | Use poses that actually challenge anatomy when demonstrating pose transfer |
| Clean studio isolation | Neutral gray background keeps the eye on the pose and overlays | Instructional clarity stays high even on small screens | Remove unnecessary background complexity when the lesson is about body shape and motion |
Where this format fits best
This structure is ideal for prompt educators, AI workflow creators, tutorial carousel covers, and any account trying to show “how to” rather than simply “look at this.” It is especially useful for topics like pose transfer, identity retention, reference mixing, and output selection.
It is less effective for purely aesthetic pages. The overlays and arrows are educational by design. They improve utility, but they reduce the kind of visual purity that a mood-first gallery might want.
- Best fit: AI tutorial creators. Why fit: the image explains a repeatable workflow visually. What to change: swap pose difficulty and overlay wording by lesson type.
- Best fit: workflow carousel covers. Why fit: the graphic promises a practical takeaway immediately. What to change: standardize the layout across a series so viewers recognize the format.
- Best fit: prompt educators teaching reference use. Why fit: the image clearly separates identity source from pose source. What to change: vary the source-image sizes depending on what you are teaching.
- Not ideal: minimalist visual accounts. Reason: the arrows and inset cards intentionally add instructional density.
- Not ideal: pure fashion photography feeds. Reason: the image prioritizes process communication over atmosphere.
Transfer recipes
- Keep: one result image, one identity inset, one pose-reference inset, and one directional arrow. Change: crouch pose to lean, jump, or seated twist. Slot template: "{identity source} + {pose source} transformed into {final output}"
- Keep: studio background and pose-focused outfit clarity. Change: the lesson from pose transfer to expression transfer or outfit transfer. Slot template: "{tutorial graphic} showing {source element} mapped onto {final character}"
- Keep: clean bottom headline and visual workflow structure. Change: the color language and complexity of the pose depending on audience skill level. Slot template: "{instructional creator visual} demonstrating {AI workflow step}"
What the image gets right aesthetically
The image is effective because the clothing supports the lesson. Cargo pants, gloves, socks, and chunky shoes all help make the crouch readable. Loose fabric shows tension at the knees and hips, while the heavy shoes anchor the body visually. This is not only a styling choice. It is a teaching choice.
The gray backdrop is equally smart. It removes visual noise so the audience can study joint position, silhouette, and weight distribution. In instructional AI images, clean space is not empty space. It is functional space.
| Observed | Why it matters for recreation |
|---|
| Deep crouch with one hand touching the floor | Creates a meaningful anatomy and pose-transfer challenge |
| Identity portrait inset and pose-reference inset | Make the workflow logic visible inside the image |
| Red arrow pointing from reference to result | Clarifies the transformation direction instantly |
| Cargo pants and chunky footwear | Improve silhouette readability and show fabric tension |
| Neutral gray seamless background | Keeps the image focused on the educational point |
Prompt chunks worth locking first
If you want a graphic like this to work, start with the workflow elements before the beauty details. The educational value comes from structure. Once the structure is clear, then the styling and realism can elevate it.
| Prompt chunk | What it controls | Swap ideas (EN, 2–3 options) |
|---|
| pose-transfer tutorial graphic with identity inset and pose-reference inset | Instructional structure | workflow poster, how-to comparison card, reference-mapping explainer |
| main subject in deep crouching pose | Anatomy challenge and visual proof | jump pose, seated twist, leaning wall pose |
| black turtleneck and beige cargo pants | Readable styling and body-line clarity | fitted tee and track pants, jacket and joggers, bodysuit and cargos |
| curved red arrow pointing from source to result | Transformation direction and clarity | straight arrow, double-arrow comparison, numbered step flow |
| plain gray studio backdrop | Noise reduction and instructional focus | off-white seamless, pale beige studio wall, clean soft-gray cyc |
| bottom headline text for the tutorial theme | Feed readability and educational packaging | COPY POSES, TRANSFER POSE, MATCH THIS POSE |
An iteration path that keeps the image useful
Lock these three things first: the result-source-source layout, the crouching pose, and the clean studio background. Those are the core teaching elements. After that, refine outfit detail, overlay hierarchy, and body anatomy in small steps.
- Run 1: stabilize the crouch anatomy and the final-result composition.
- Run 2: improve the inset hierarchy so identity source and pose source are instantly distinguishable.
- Run 3: refine fabric folds, footwear grounding, and hand placement.
- Run 4: remix the lesson type while preserving the same educational visual structure.
If the graphic feels confusing, simplify the overlays. If it feels too plain, choose a harder pose or a more readable outfit. The strongest version stays practical first and stylish second.